


by Editor

We tell you what this mysterious Facebook Pixel is, why everyone is trying to implement this tool in their campaigns, and whether a webmaster really needs it to drive traffic to CPA offers. And of course, we will show you step by step how to install and configure it. Let's go!
What is Facebook Pixel
Facebook Pixel is a script that is installed on a landing page. After installation, you will be able to track targeted user actions directly from your advertising account: what buttons the user clicked, what pages he viewed, what products he studied, and which he sent to the basket.
As a result - not just general statistics of visits, sales and a map with the geography of customers. You get a portrait of the target audience, understand how it behaves, and you can even find out the interests of the target audience - all this allows you to fine-tune targeting.

But that's not all. AI Facebook will also be involved in the process. By analyzing user behavior data at all stages of your marketing funnel, AI will more effectively target audiences to improve the results of your advertising campaign. For example, if a user was viewing products in your store, Facebook will definitely show him an ad with a reminder of an unfinished purchase.
How FB pixel works
Facebook Pixel is an executable script, if simply, a small application that is launched by the browser when the user navigates to the site. It can read information from browser cookies, by which it can identify Facebook users (by a unique browser identifier).
The code contains tracking conditions, such as page view or cart filling. If the user performs one of the recorded actions, the Pixel captures this and sends the information to Ads Manager - you can see the statistics in the Events Manager tab.

What does the facebook pixel code look like
Why a pixel is better than traditional UTM tags and a tracker
The history of user actions is uploaded to the advertising account. As a result, you can:
- Set up retargeting more effectively. Retargeting or remarketing is the display of advertising to visitors who have previously visited the site in the application, but the targeted action did not occur. For example, a client saw a banner for the first time, went to the site, looked at the product and even added it to the cart, but did not complete the purchase. Thanks to the Pixel, you can capture the action and show a reminder ad that will push him to complete the order or purchase related products.
- Easier to optimize ads. You can see how the audience behaves after going to the site from an advertising link, from which devices the conversion is higher. All this allows you to optimize your targeting settings and plan advertising campaigns more successfully.
- Build a look-a-like audience. The pixel allows you to find people who are similar to your customers. They can be of the same age with similar hobbies, education level, geo-referenced.
- Exclude irrelevant audience. For example, you can cut off users who have already seen ads and went to the landing page, but spent a few seconds there. Or buyers who have recently placed an order.
What events can be configured with a pixel
Events - visitor actions in the online store/app. The list includes standard ones - pre-assigned by Meta - and special ones. In total, up to 100 special actions can be configured. You can do this in the Events Manager. You can connect all or select only a part in any combination.

Standard events:
- Filling out the form with payment details;
- Adding to the cart of the online store;
- Adding to favorites;
- Registration with contacts (mail, phone);
- Indication of contacts - (contact support, call);
- Product personalization;
- Donation;
- Search for a location (office, shop, cafe) through the site;
- Start of placing an order (the "Place an order" button, filling out the form for a call back);
- Lead (registration with downloading free materials or getting demo access);
- Purchase;
- Planning (booking a table, tickets, etc.);
- Search on the site, application;
- Start of the trial period;
- Submission of an application, pre-order;
- Paid subscription;
- Page view.

If the basic actions are not enough, you can set up special ones. For example, filter completed orders by price (all sales with a check of $50 or more) or optimize ads for unusual actions.
How to install Facebook Pixel
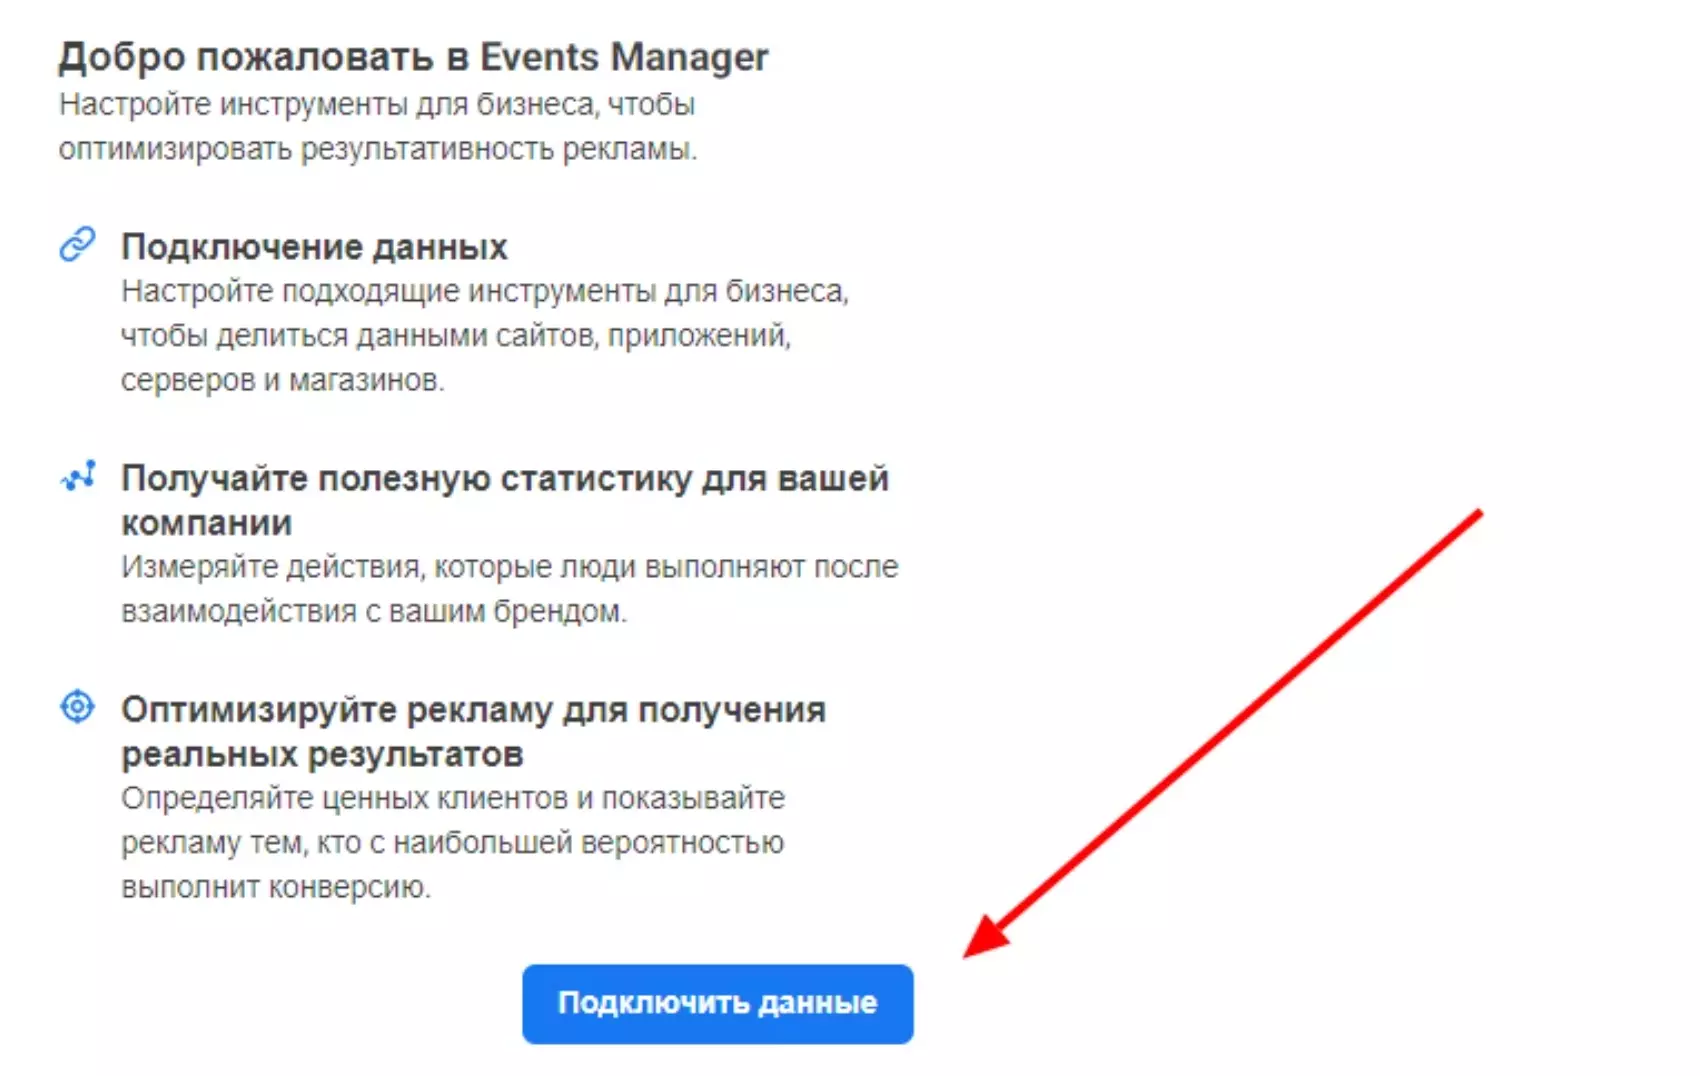
After you have created a fanpage and a business manager, go to Ads Manager, open the main menu (the “sandwich” icon), select the “Events Manager” section. Screenshot, you could find it above.
If you are connecting Facebook Pixel for the first time, a dialog box will immediately appear asking you to connect data. If not, you will be taken to the Manager page, where you can view the running Pixels or add a new one (the “Connect data” button).
Select a data source. This may be a website (section “Internet”), a mobile application (“App”). “Offline” sections and integration with CRM are available only after connecting “Business Manager”.

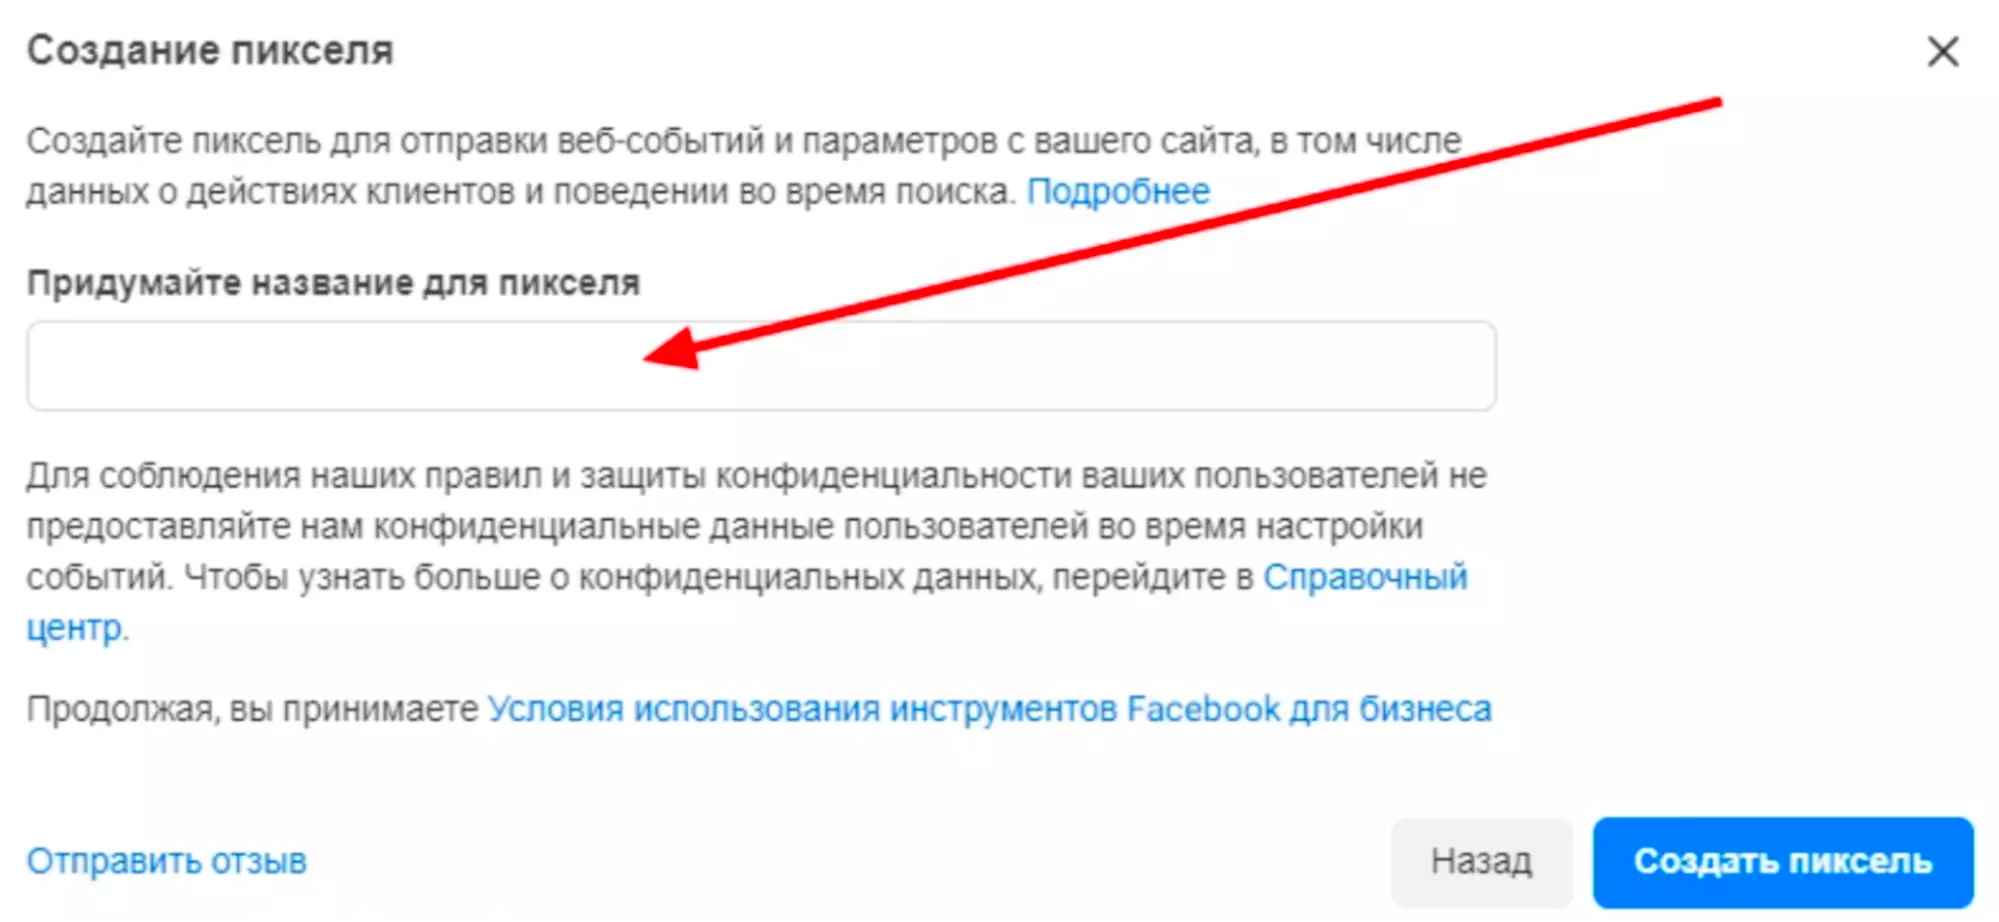
The next section is called FB Pixel to make it easier to track different campaigns later. The name can be set to any.
Next, you need to choose a connection method. Select "Pixel Only".

In the Pixel installation method selection menu, there are two options: copy the code or through “Partner integration”. The second method is suitable if the portal is created on the platform of WordPress, Shopify, Joomla or another service from the list of partners. Then it remains only to copy and paste the ID in the control cabinet.
If the site is written manually or created through a constructor for which quick integration is not available, select the “Install code manually” option.

Copying a script and then pasting it is more reliable. The generated code with the specific site ID appears on the settings page. For convenience, there is a button "Copy code".
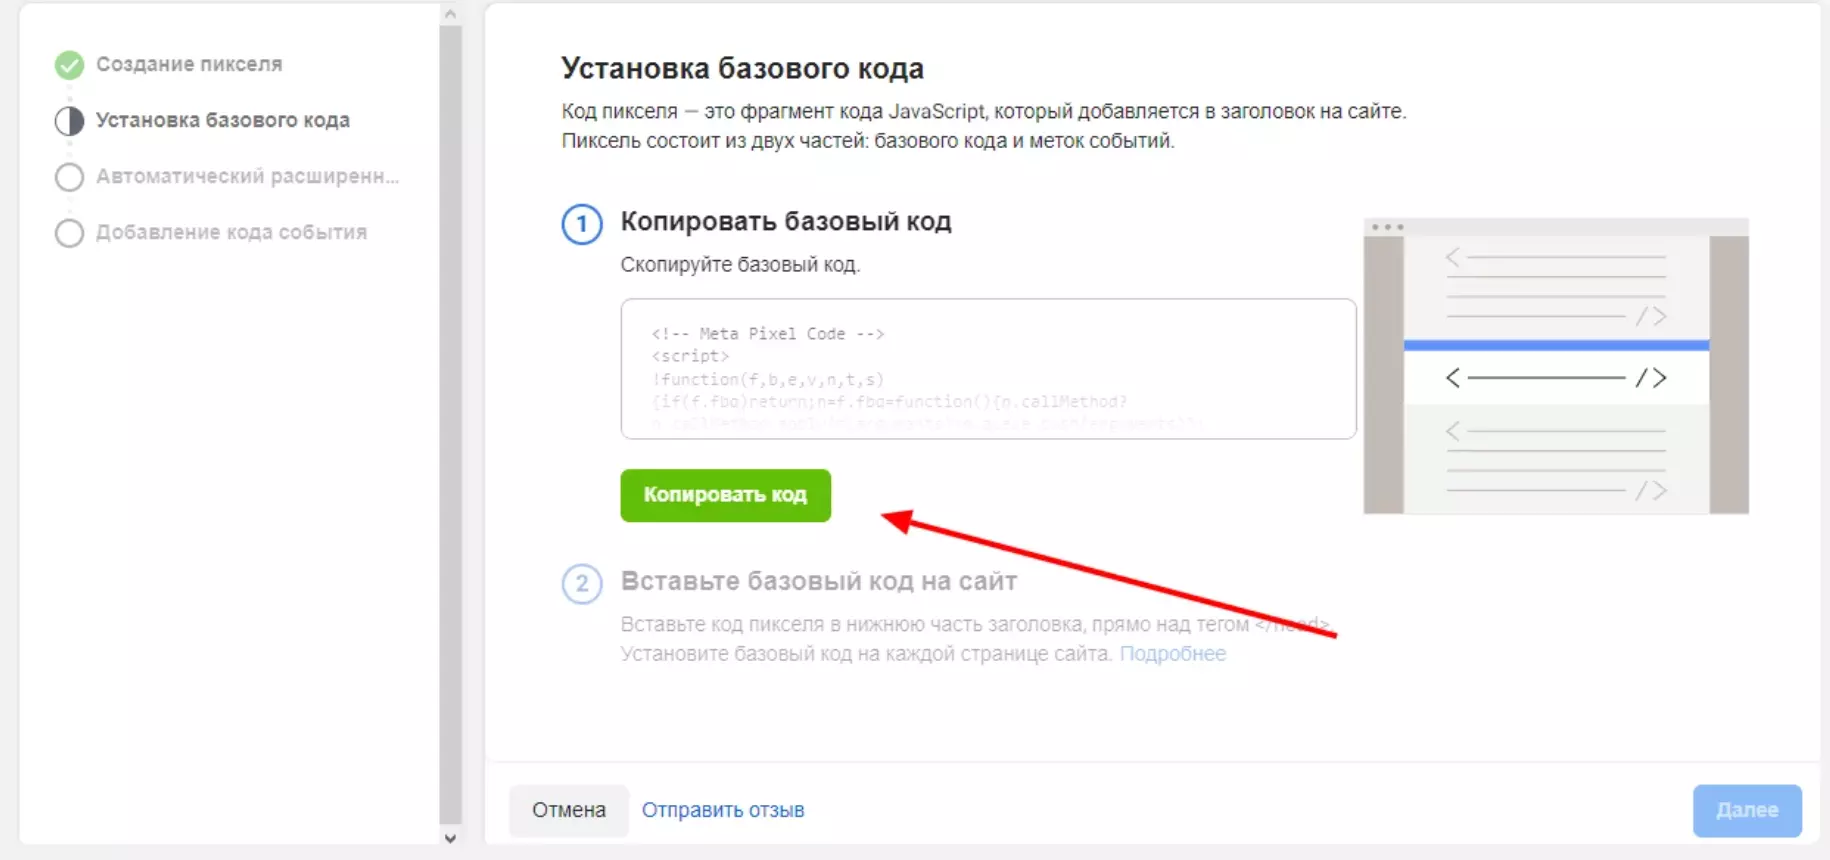
After copying, open the HTML code editor in your CMS or in the site builder. (On self-written sites, you will have to edit html documents manually). Add the pixel script to the header before the closing </head> tag - so it will automatically work on all pages of the resource.
An alternative option is to insert the jawa script into the html code before the closing </header> tag, usually placed in the main body of the site (between the <body> and </body> tags - in this case, you will have to install the Facebook Pixel on the site on each page). The second way programmers consider more reliable - when added to the header, sometimes there are failures with tracking actions. It remains to complete the configuration:
The last step is setting up events. All standard ones are installed by default. Special actions must be connected manually.
Facebook pixel test
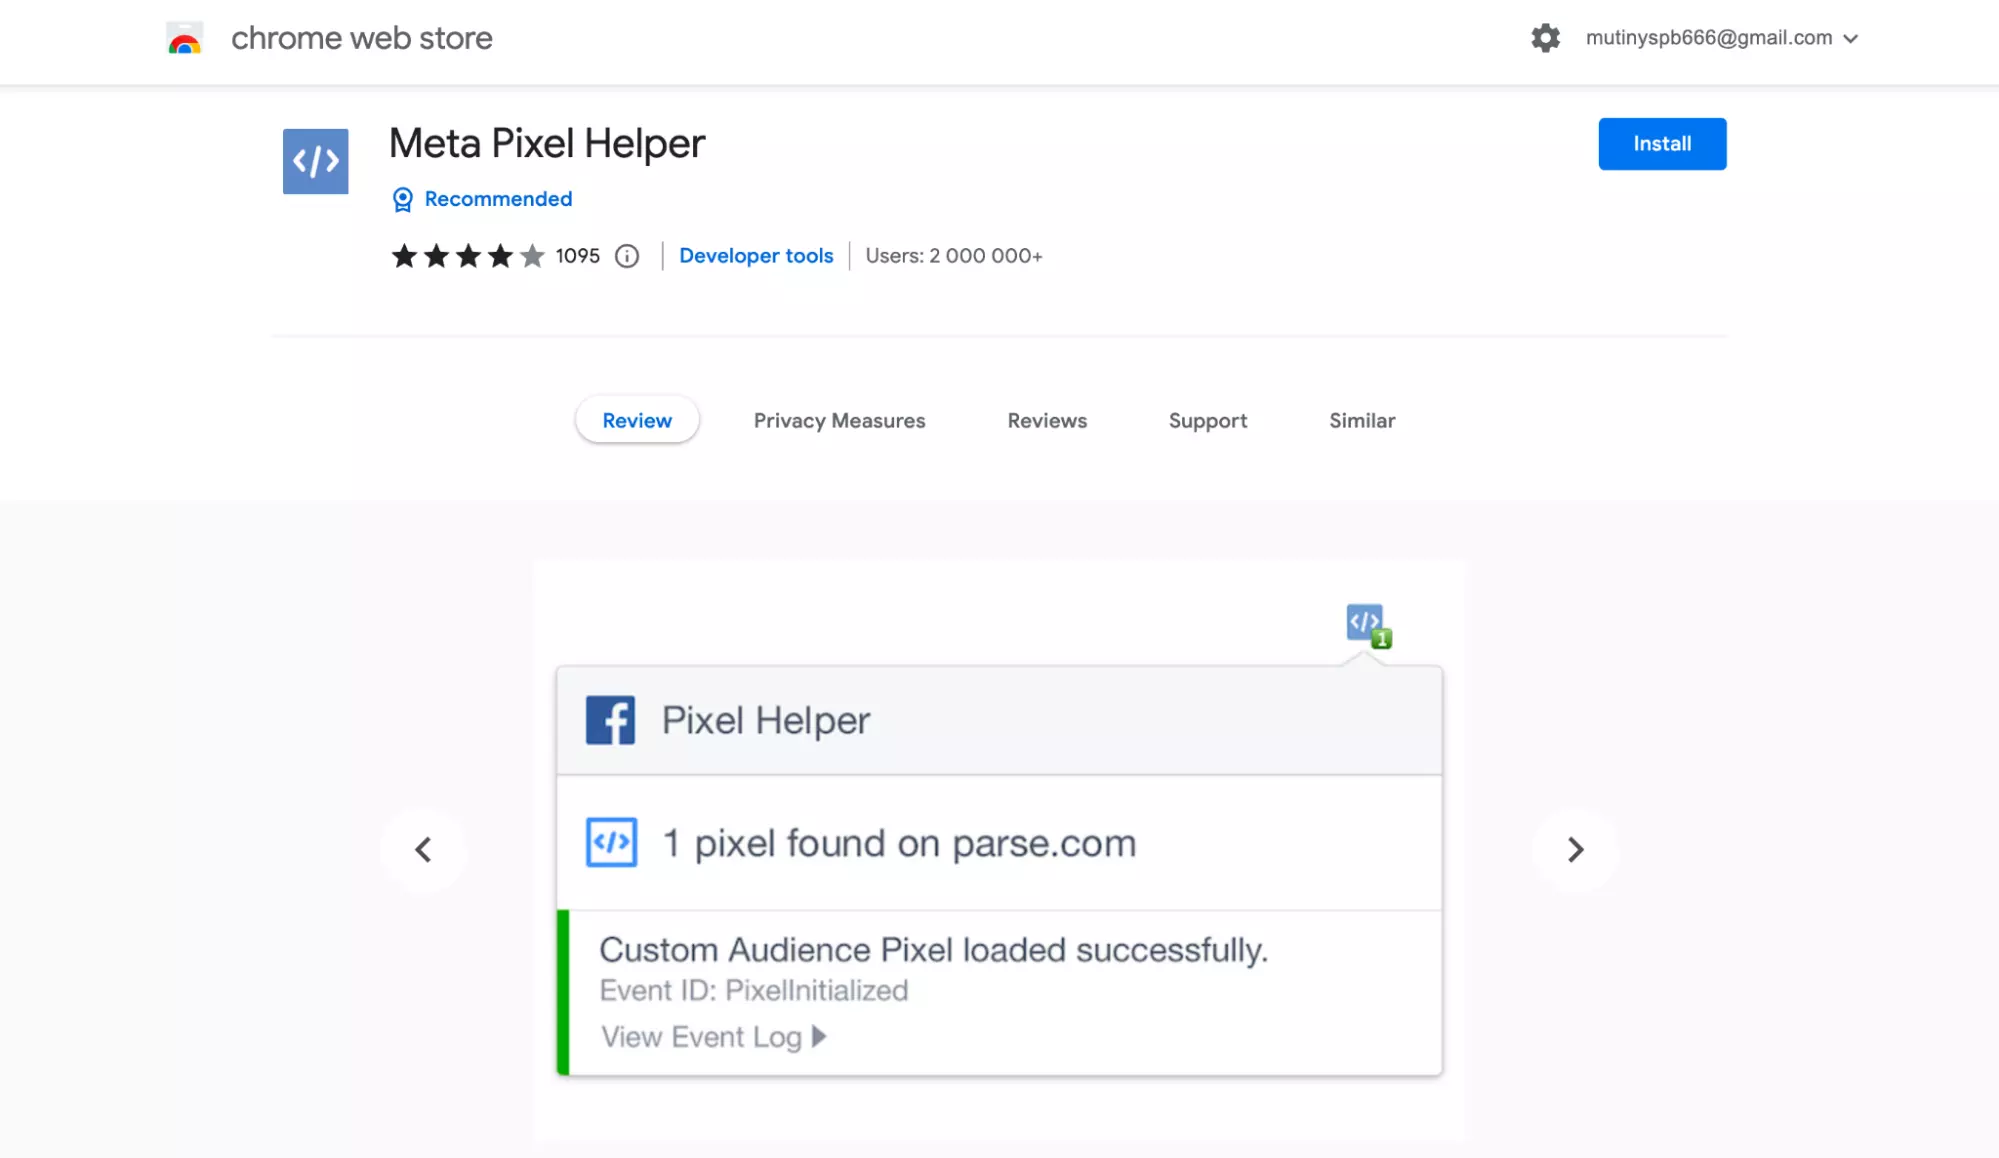
There are two ways: through a browser extension or through an advertising account. The first option is more convenient. Install Facebook Pixel Helper on the browser (so far only available for Chrome and browsers based on the Chromium platform). After that, go to your site, click on the extension icon and see how well the tool works.
The second option is through the testing tool in the “Event Manager”. The algorithm of work is simple. Select the necessary FB Pixel, open the menu “event testing”. We enter a link to the resource, press the “Open site” button, after the transition we perform various actions and see if they are displayed in the Manager. If this is your first time doing this, here are the instructions.

The Facebook pixel is an important tool for collecting information about website visitors and their activities. Installing it is easy, we hope that our instructions will answer all your questions.
FAQ
Pixel is a free tool?
Yes. You can generate and copy the script in the Ads Manager advertising account. There is no fee for downloading the tool or for using it. Available to all advertisers, including in the basic format without switching to the Business version.
How many pixels should be installed on the site?
The script should be on every page. In this case, the code is generated for the site only once, and then copied. In practice, the Facebook Pixel can be added to the site once in the header before the closing </ head> tag. Some webmasters and programmers recommend typing not in the header, but in the body of the page itself (insert before the closing </header> tag between the <body> and </body> tags). This eliminates the possibility of errors.
by Editor

comments ....(0)
Leave a comment
You must be in to leave a comment