

by Editor
Hundreds of articles in Google search results tell what cloaking is, often with the message that masking the content of advertising and such black methods of promotion are bad and a self-respecting webmaster will not do this. The policy of our resource does not support this position. If you can make money on this, then we will certainly not only tell about it, but also show how to actually do it in practice and very cheaply. Lets go!
What is cloaking, what is it for and where is it used
Cloaking in affiliate marketing is a technology of hiding or substituting content, in which users are shown different content when they click on a link.
The technology allows you to hide the landing page from those who should not see it, and replaces it with a page with different content. Usually, pages are hidden from:
- search engine bots and content verification algorithms;
- moderators so that the site skips the ad that does not comply with the rules, and the advertising account does not get banned;
- advertisers, if traffic is attracted from resources that have been banned;
- competitors to protect their creatives and bundles from plagiarism;
- spy services to keep you anonymous online.
Moderation bypass is the most common reason for using cloaking. Ad networks impose strict requirements on advertisements and are sent to a ban for violations of them. For example, advertising a casino on Facebook Ads is strictly prohibited.

If a webmaster wants to effectively use FB or Google Ads, he will have to resort to cloaking. An ad account found to be using it will be blocked. It is worth mentioning right away that cloaking is officially prohibited in all advertising networks. Sooner or later, all accounts using cloaking are detected by algorithms or moderators.
How cloaking works
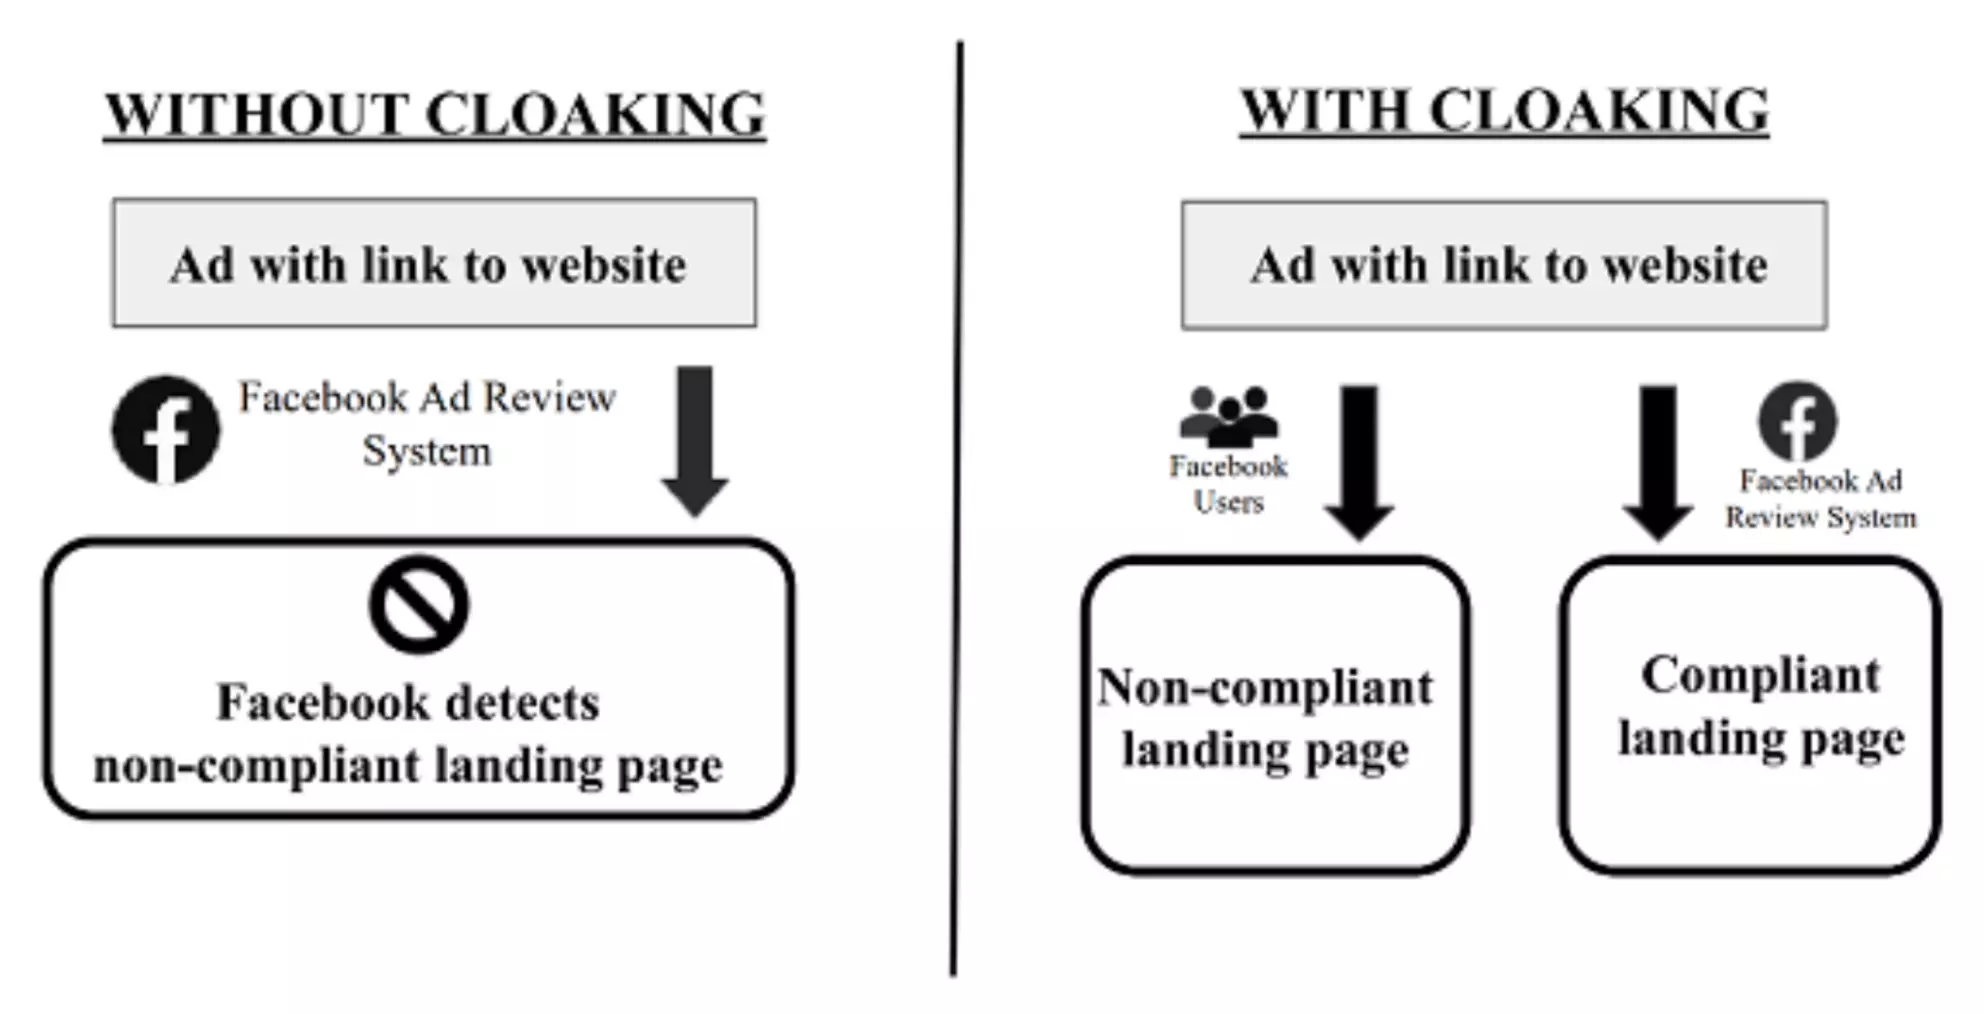
The technology divides users into streams (depending on the transition parameters) and offers them different pages using the same link:
- The group of users from which you want to hide the promoted content, when clicking on the link, gets to the so-called “white page”, the content of which complies with all the rules and regulations of the advertising network;
- The group of users to whom the content needs to be shown, respectively, gets to the landing page.
Types of cloaking
To implement cloaking, the following techniques and tools are used:
- Trackers and TDS- services that allow you to track the statistics of clicks to your site and distribute traffic according to the parameters;
- Redirect- acceptance of redirecting the user from one resource to another (the redirect method is considered an obsolete form of cloaking and is almost never used anywhere);
- JS- scripts - installing a special code on the landing page that tracks user parameters and automatically adapts the content of the page to the corresponding visitor.
How to cloak with the Keitaro tracker
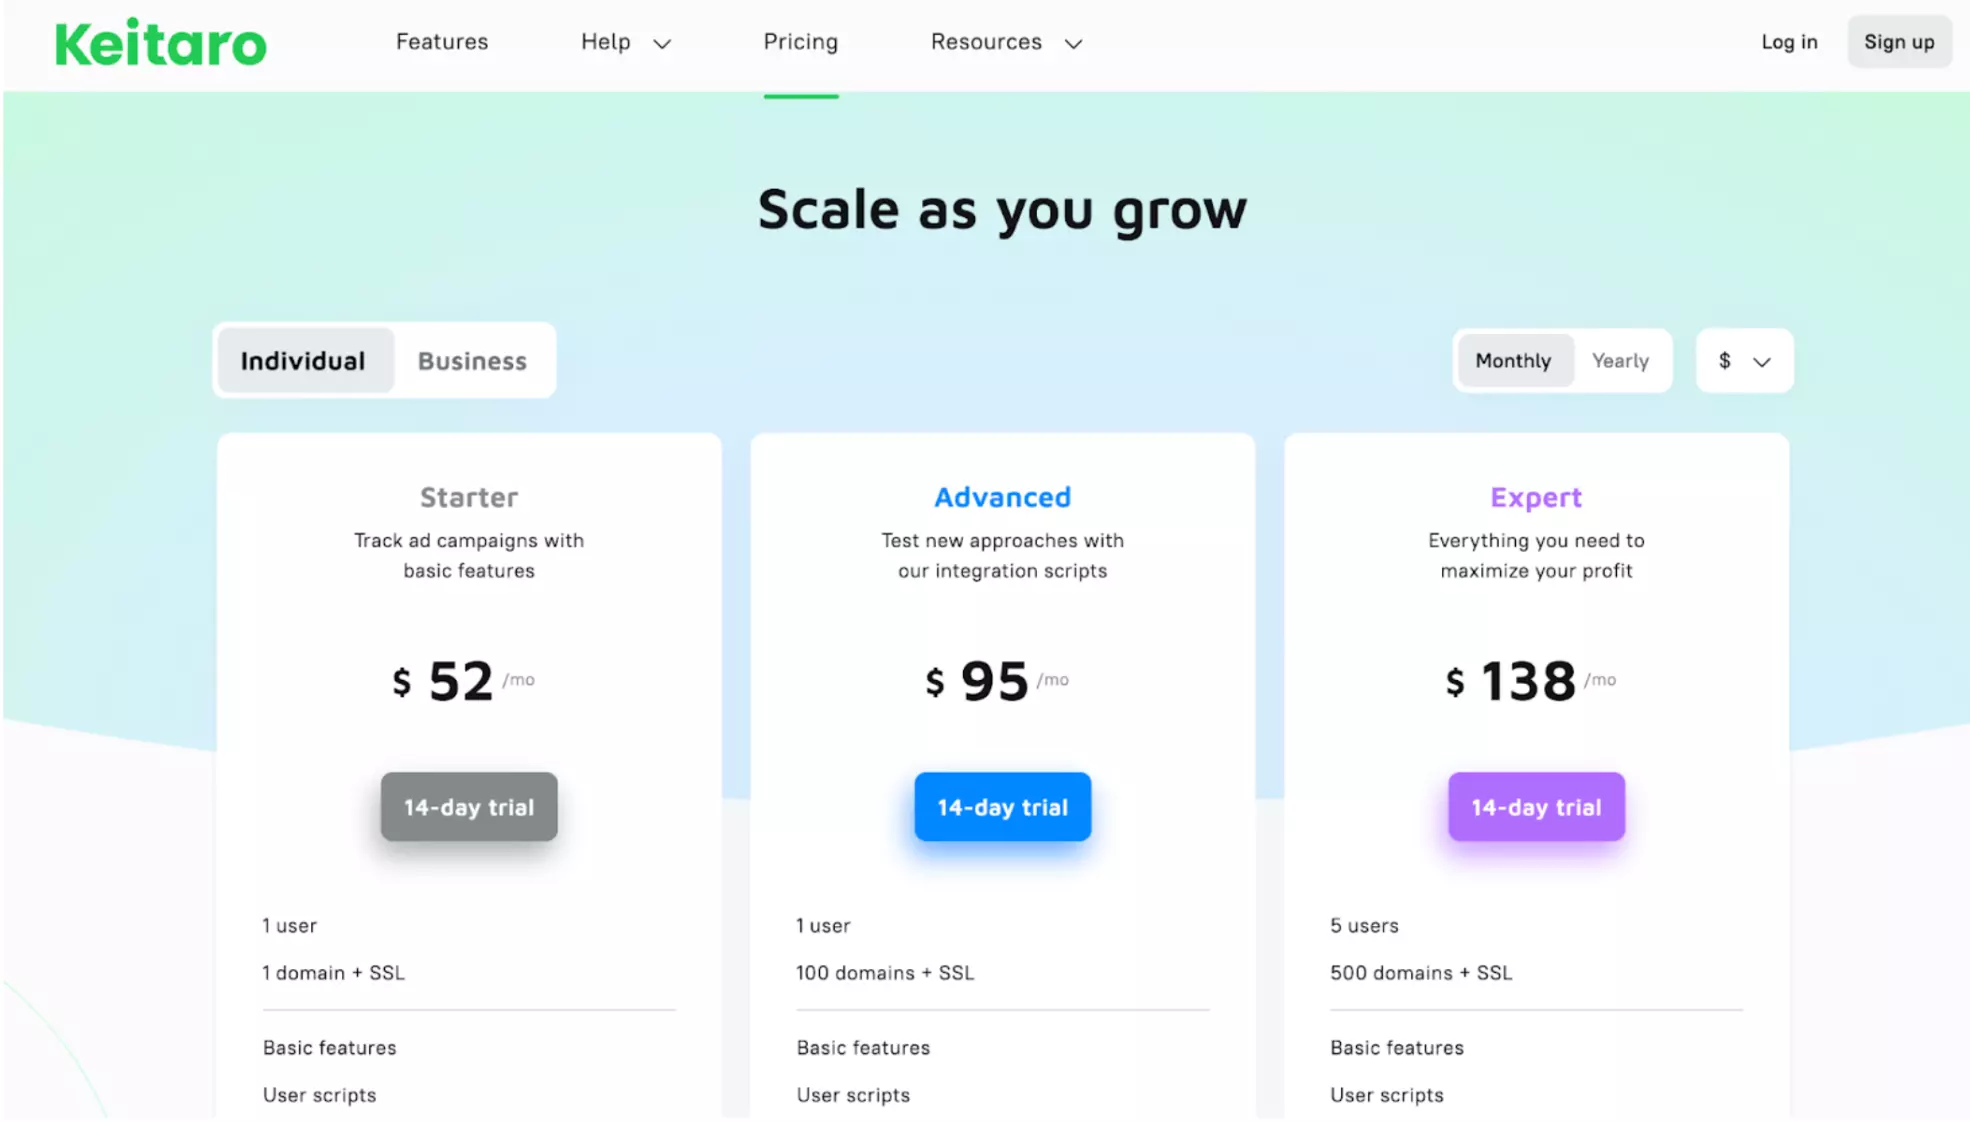
Why tracker Keitaro? Everything is simple here: it is cheap, we have hundreds of positive feedback that you can successfully work with Facebook (according to rumors, also with Google, but we have not checked it) and besides, it is also a tracker. So when you buy a subscription for $52 per month, you immediately get a cloaking service and a tracker. Profit!
How to install a tracker / cloaking service on the server was described in the article: "How to install a tracker on a server for free".
As mentioned above, the task of cloaking is to take bots to the whitepage, and the target audience to the offer page. Accordingly, we need to add two streams to the tracker with our pages - a white page and a partner landing, between which bots and the target audience will be distributed. In general, we went visually using the example of setting up our campaign for the launch of nutra.
Loading landing pages and creating a stream for whitepage
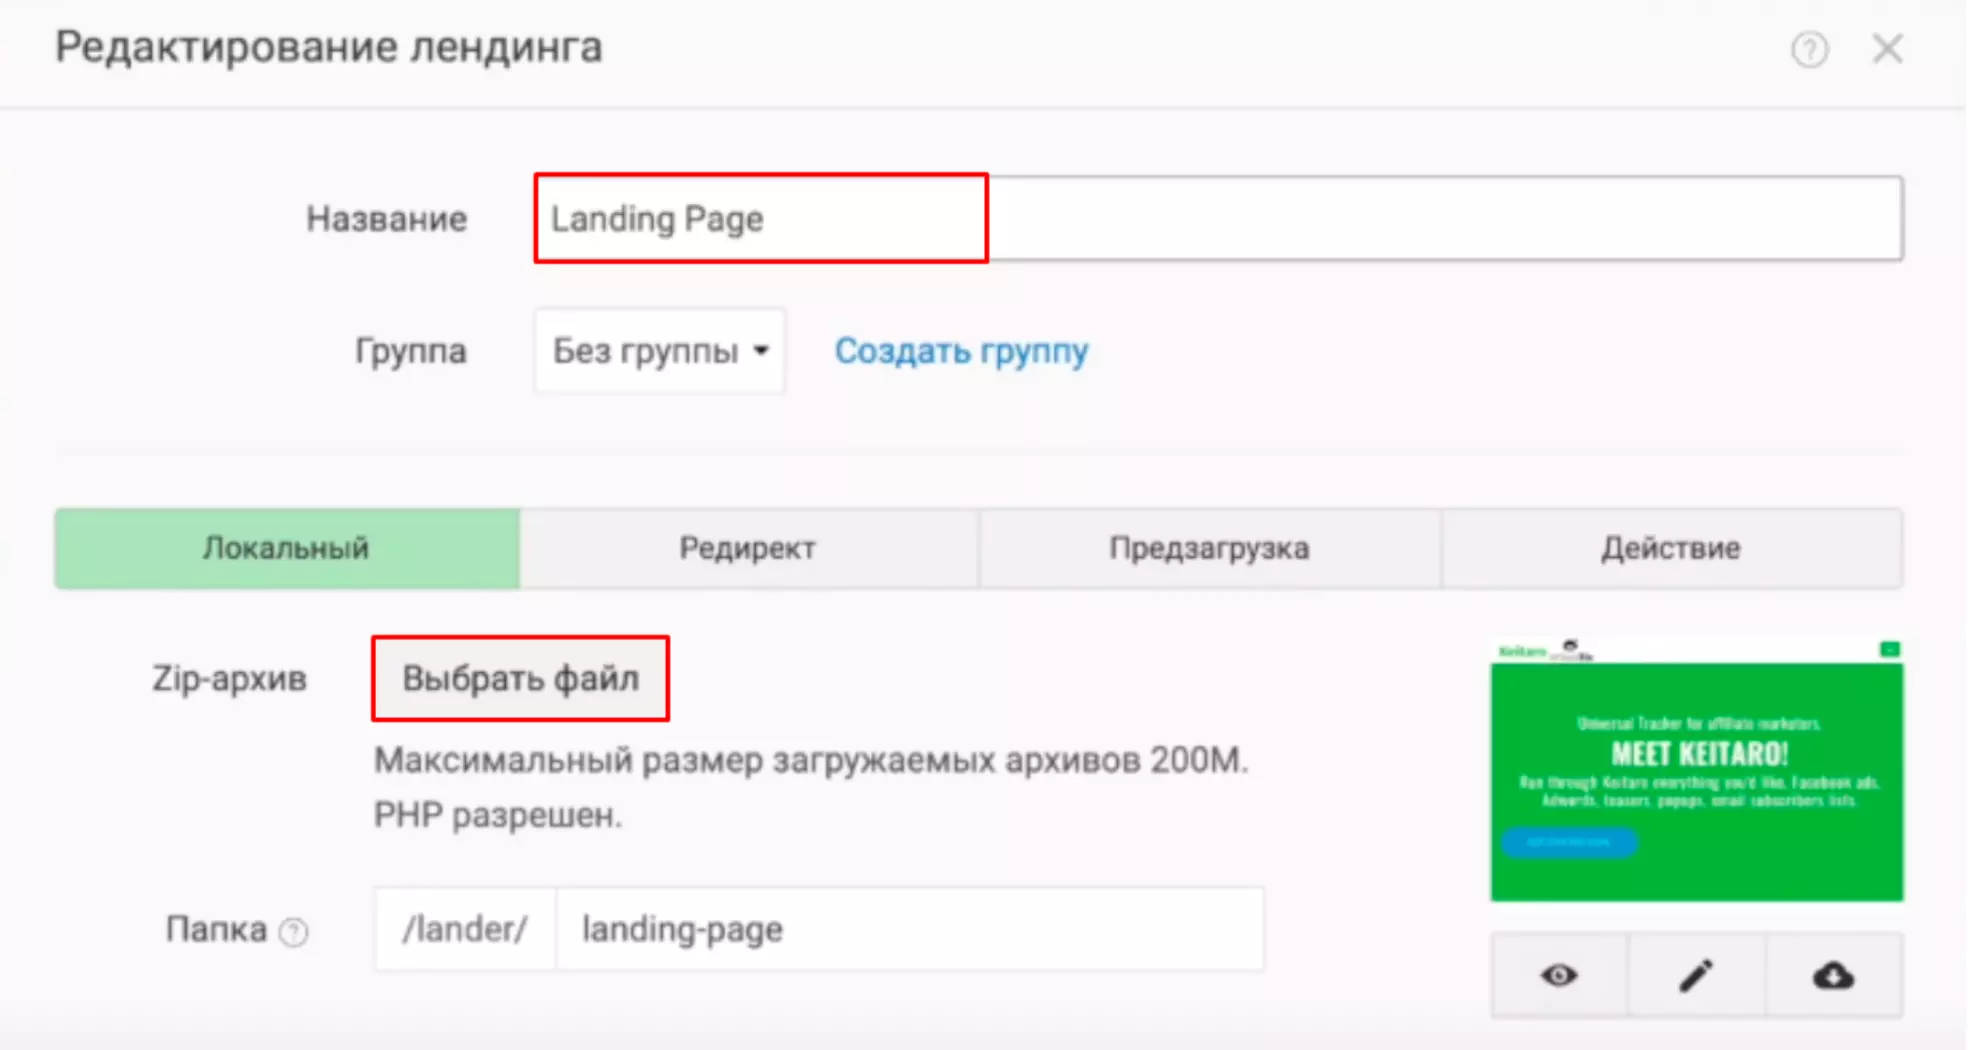
Launch the tracker → immediately go to the “Landings” tab and upload archives with prepared whitepage and partner landing (or pre-landing). Don't forget that the white page must be relevant to Creos, otherwise you will get a ban marked "CLOAKING", although, by the way, we haven't seen such a tag for a long time.

Here we give the landing a name, so as not to get confused, select “Local” and upload the ZIP archive. It's all over.
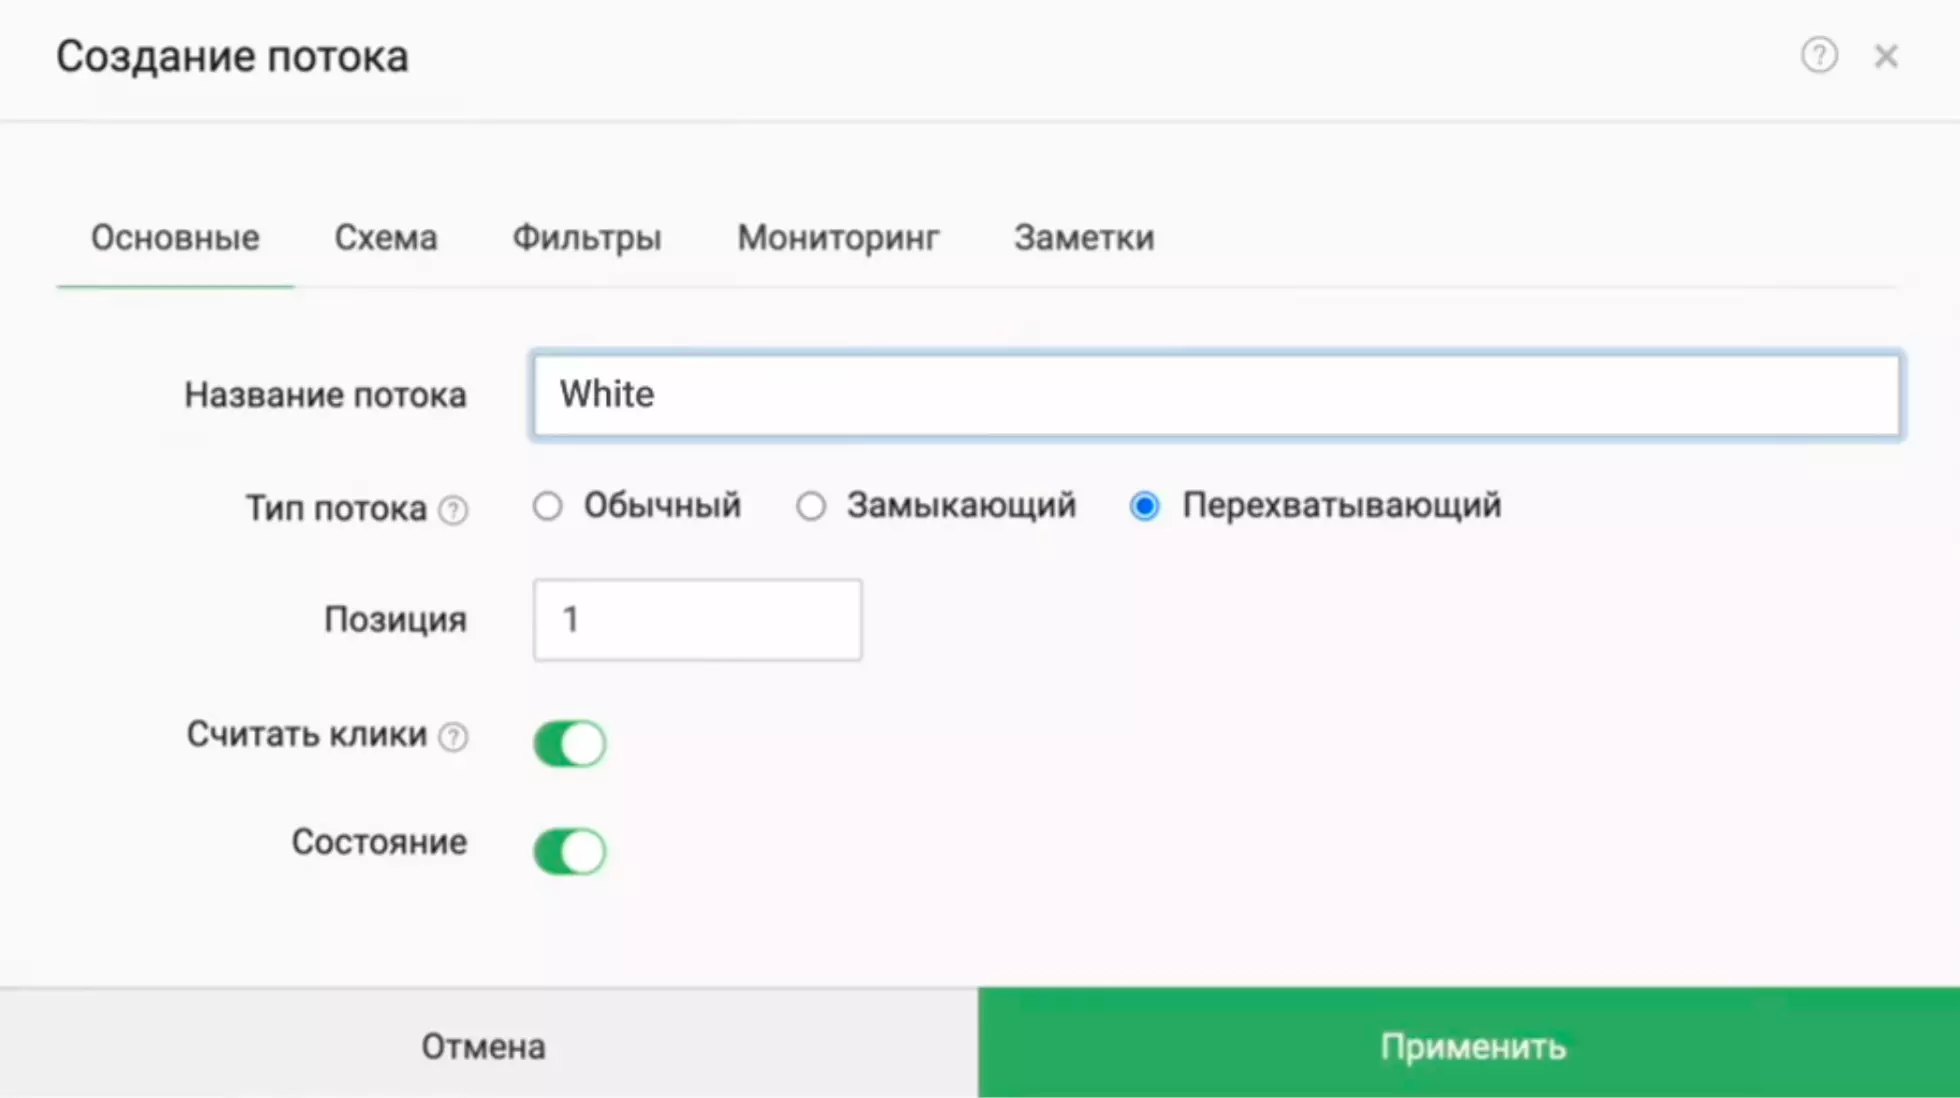
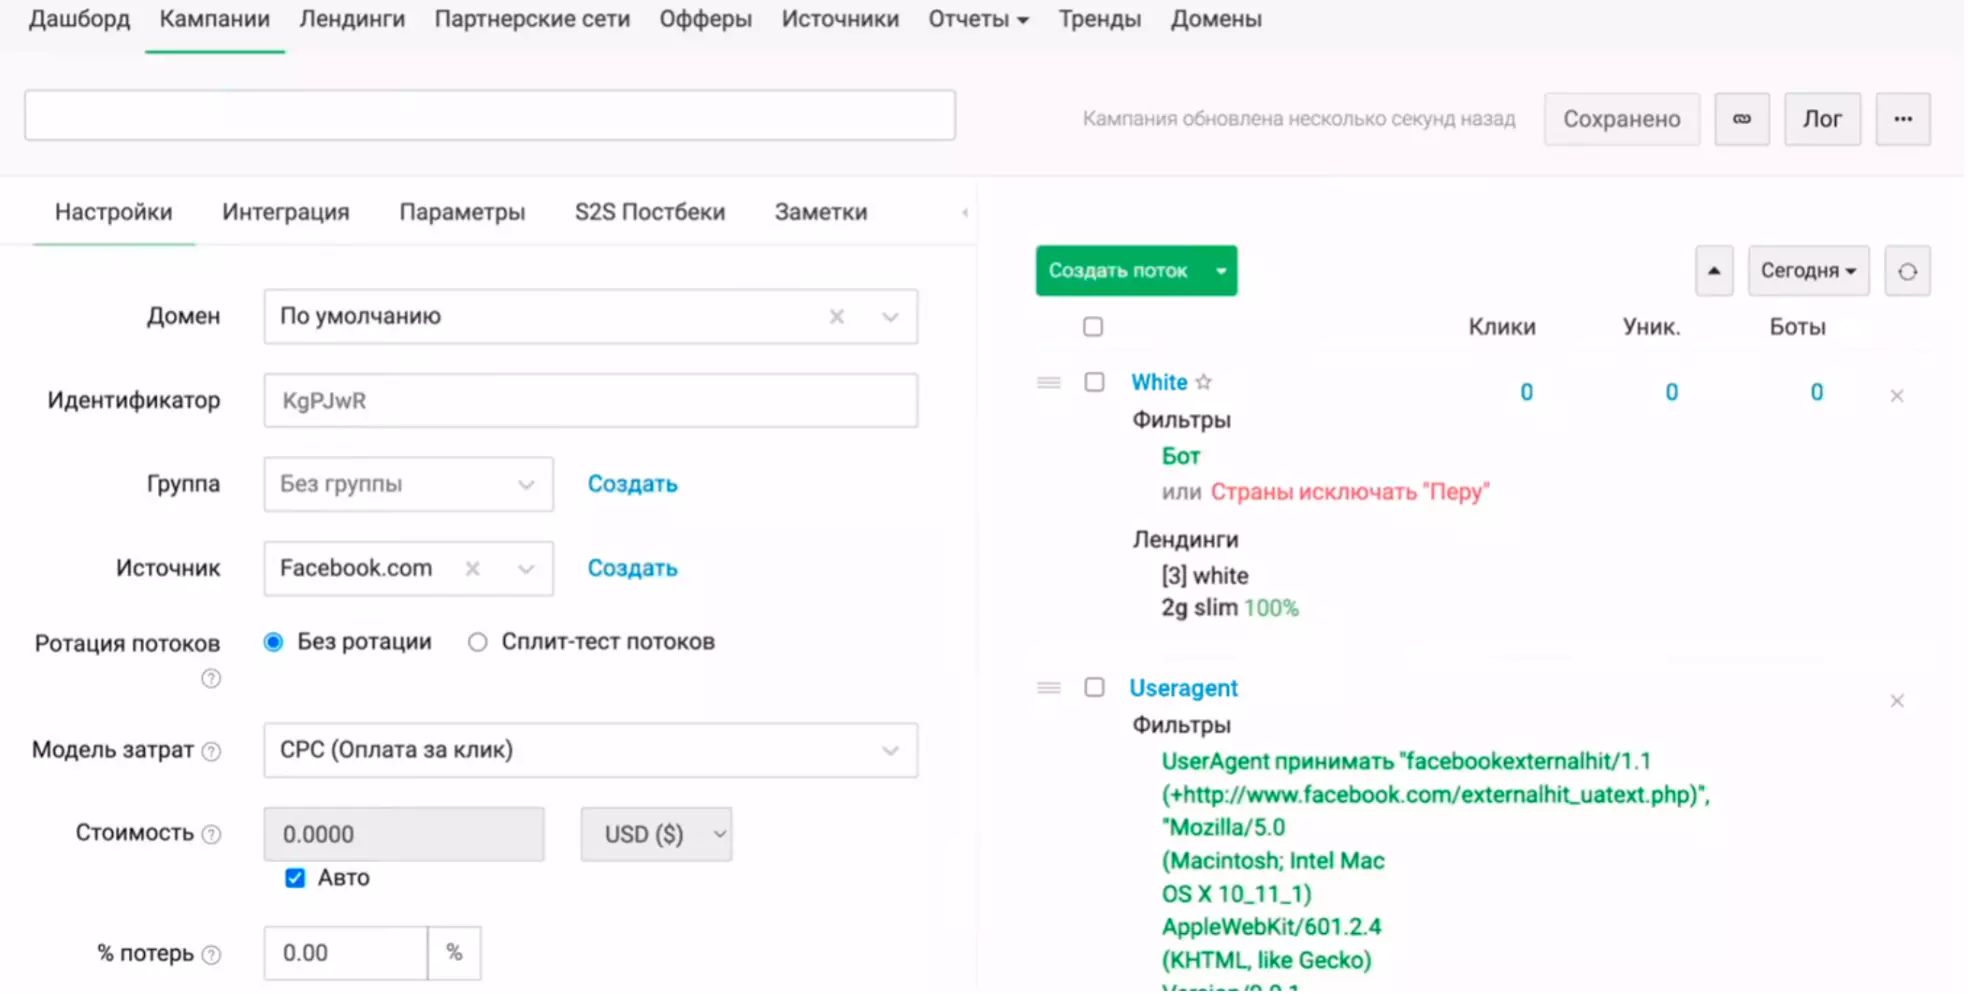
Next, go to the “Campaigns” tab → give it a name (arbitrarily) and click on “Create a stream”. Now we have this form. Here, except for convenience, you can change the name of the stream to “White” or something similar, so as not to get confused. We set the stream type to “Intercepting”, since our white page should catch bots. Position - "1". If you put two, then white will be shown to the target audience, and not to bots, but we don’t need this.
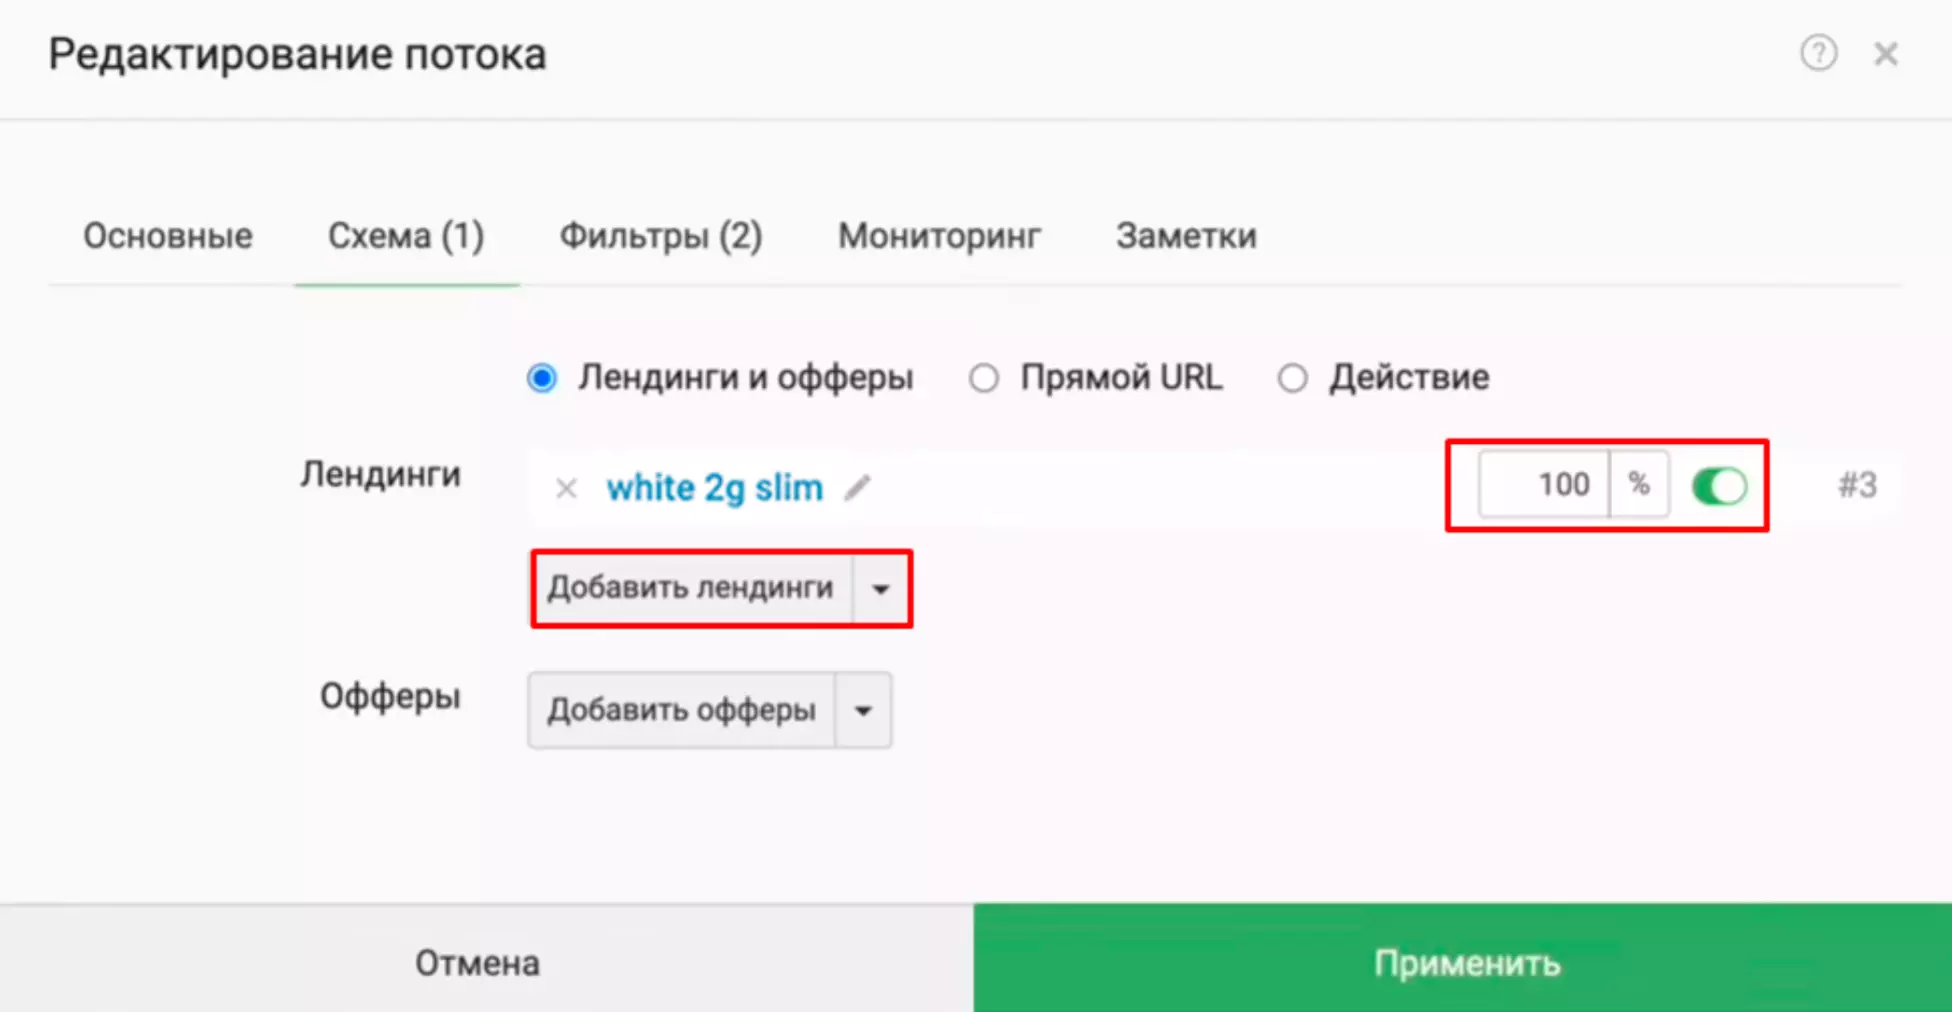
Then right there in the tabs we see “Scheme” → click → the item “Landings” → in the drop-down menu, select our previously loaded white. If you haven't uploaded any landing pages, you can choose "Direct URL" and work like that, but it's better to do without extra redirects.
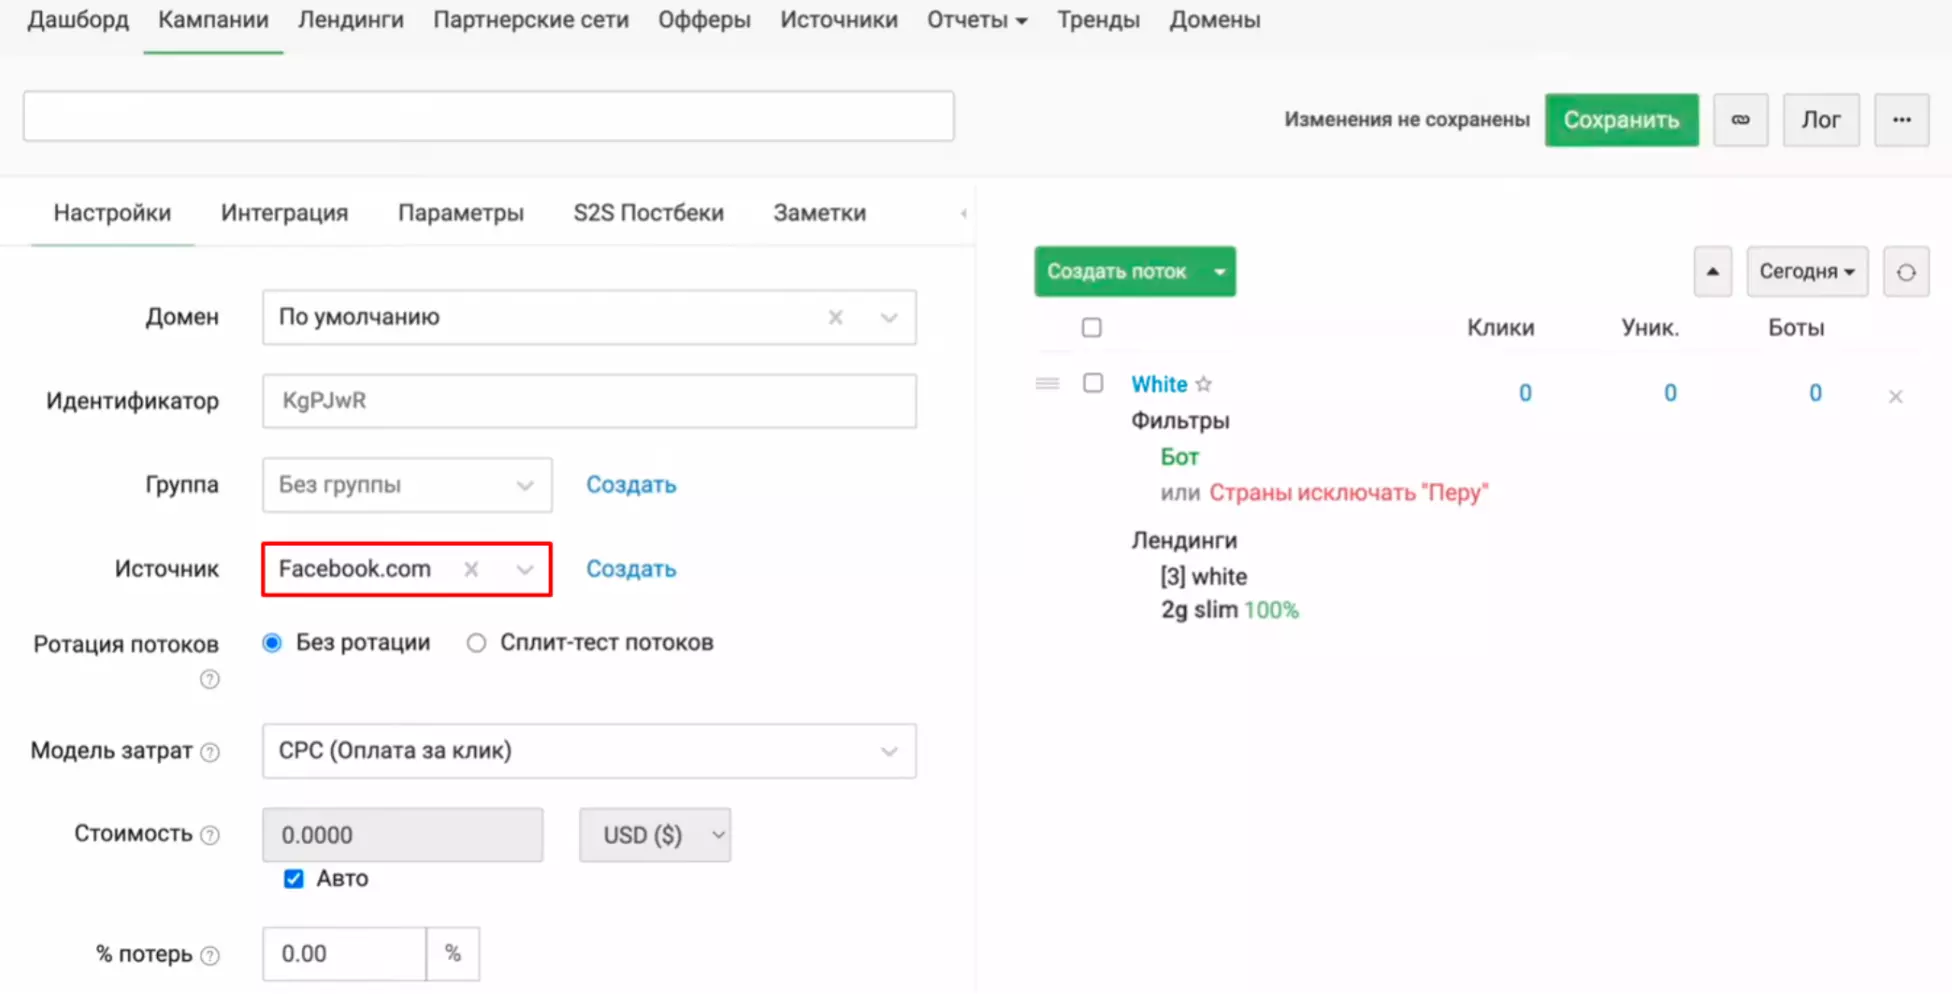
Next, go to the “Filters” tab → change “Relationship” to “Or” → next in the list select “Bot” with the mark “Yes” → further in the list select “Country”. Here we have to click “No” and select the GEO we will be uploading to. That is, if we pour into Peru, as in our example, then absolutely everyone will see our white page, but not the inhabitants of Peru. All. Now "Apply" and "Create".

You can also delve into other filters, such as “Device type”, if this is written in the requirements of your offer. But honestly, we never needed this filter.
P.S. When you check whether you have configured everything correctly or not, then first look at your domain and, if everything is correct, you will see a white page. Then you return to this tab with filters, add your country to the exclusion, where you start from and where you actually are. Save, reload your white, and if everything is correct, your affiliate landing/preland will open, but not white. Then just come back and delete your country, for that you will know for sure that you are not pouring past.
Loading the user agent
After clicking “Create”, we are returned to the main menu, where we already see the settings of the first stream. Here we need to a) specify the traffic source, b) add a user agent. In the box on the left, you can also add your domain via the "Domains" tab at the top and then select it from the drop-down menu. Add groups to compose your streams. The cost is just a tick on “Auto” and forgotten. We don't touch everything else. Everything has already been thought of for us.
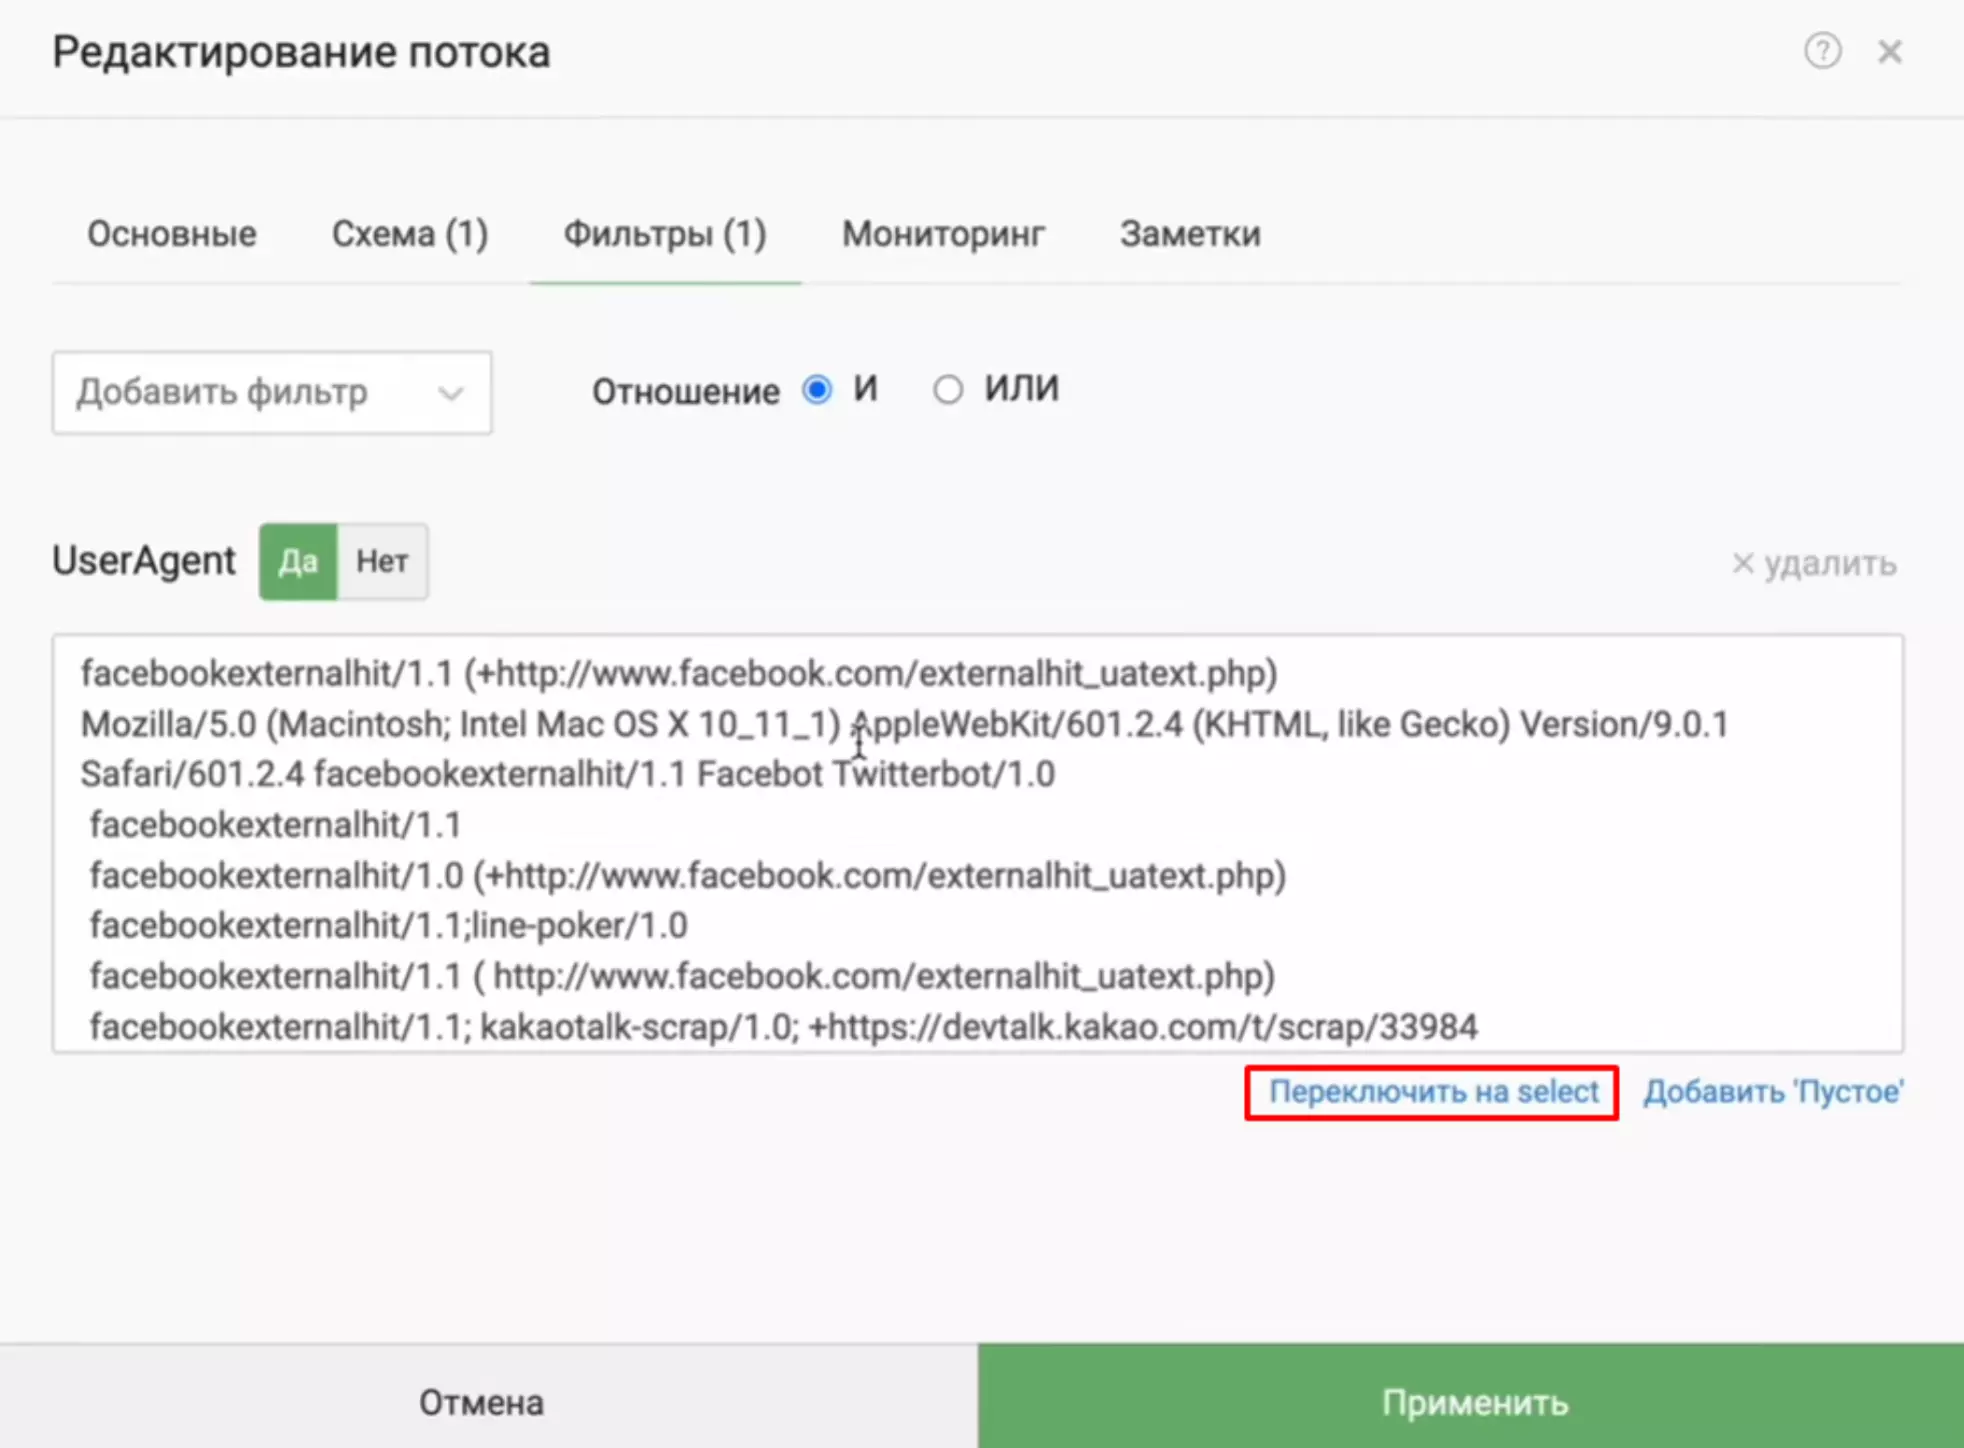
About the user agent. If you don’t have it, then don’t worry, cloaking services replenish the database themselves. It’s just that if there are additional ones, then, as they say, it won’t be superfluous. We upload the file just in case. To load the user agent, click on the “White” stream and additionally specify the UserAgent in the filters. We usually do this in a separate thread, it's just more convenient. In the field that opens, insert our user agent. It will be inserted in "select" format, you need to switch to "textarea". Next "Apply".
Creating a flow for affiliate landing / pre-landing
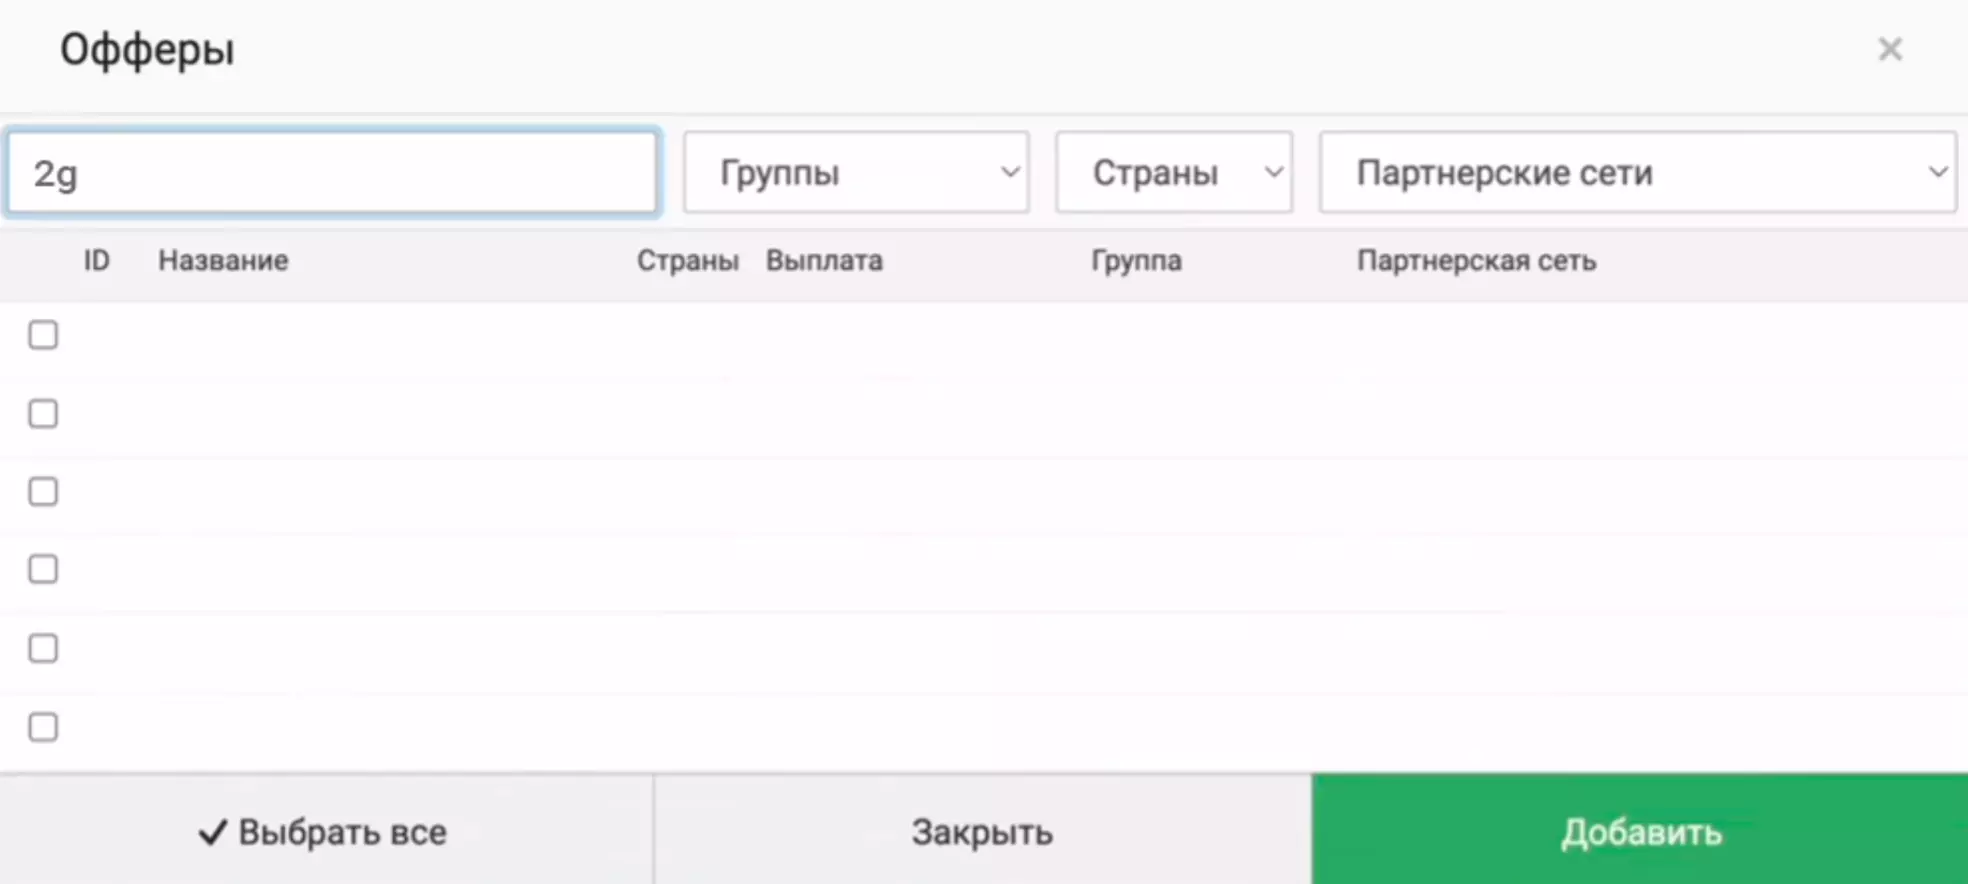
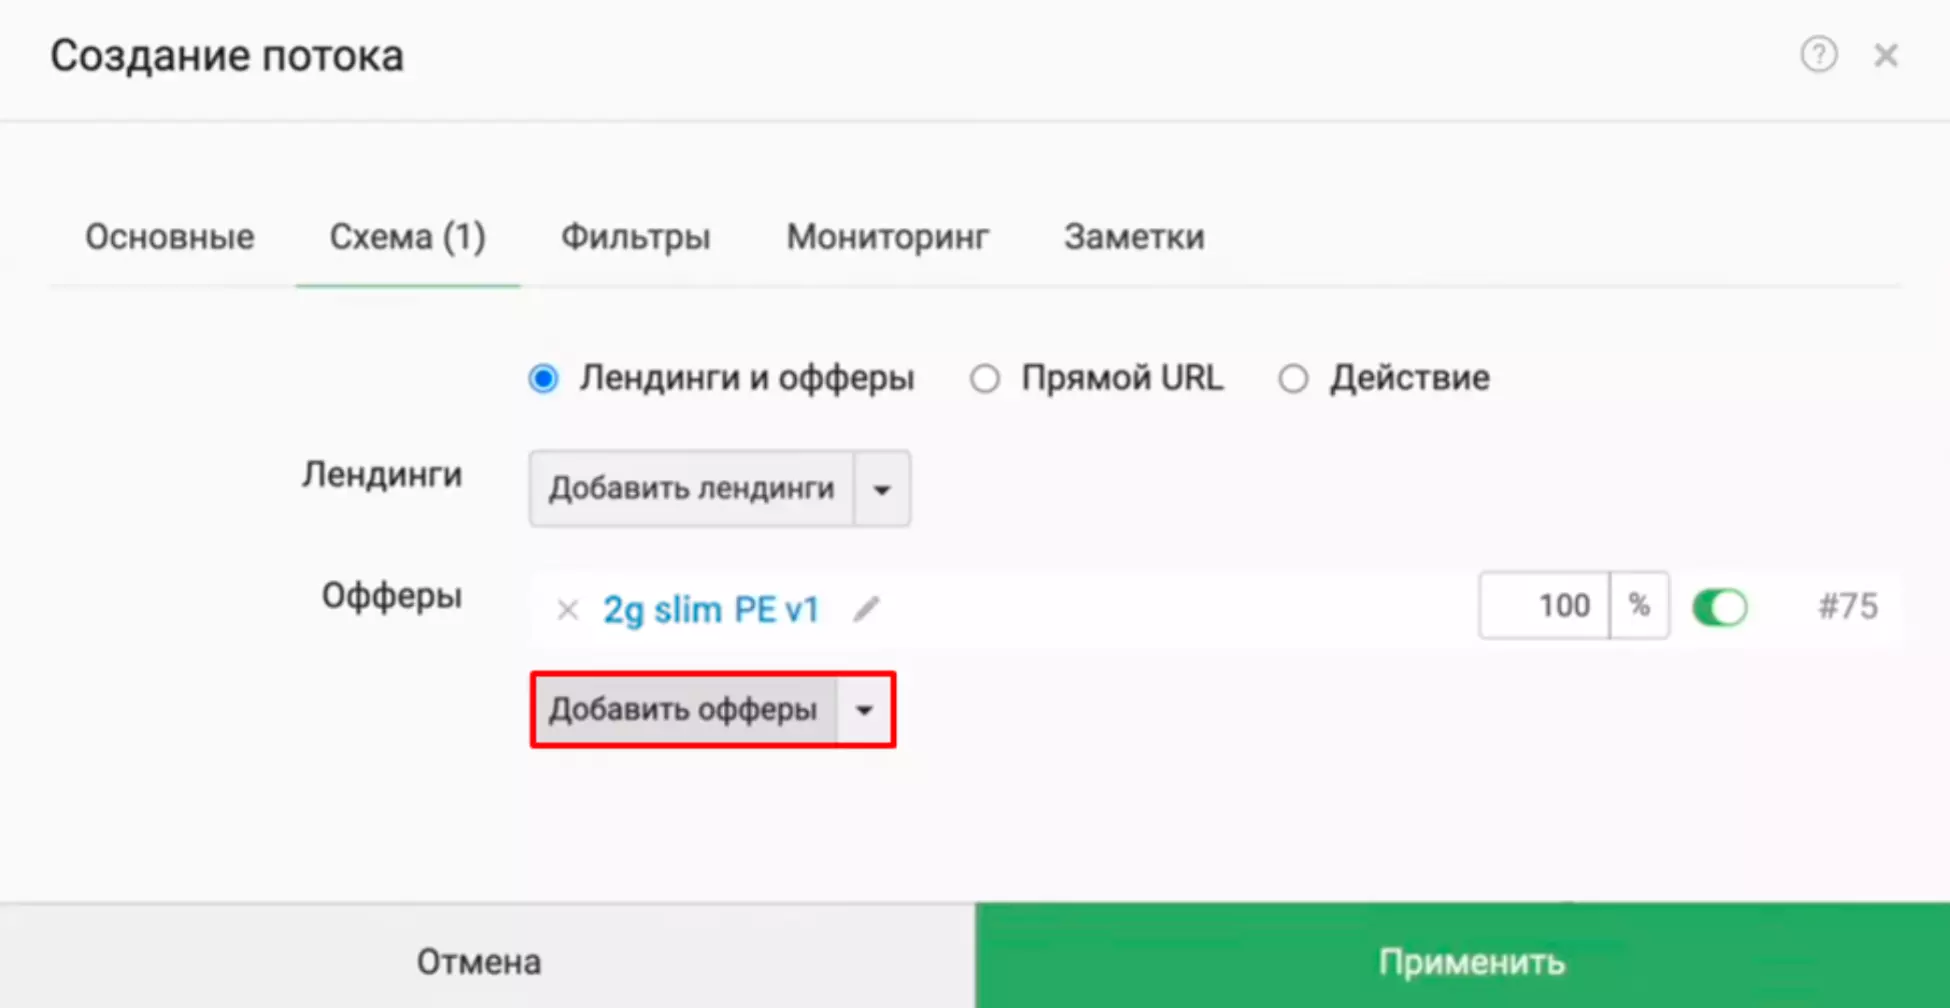
Previously, we have already uploaded our affiliate landing/pre-landing. Now it remains for us, by analogy with the “white” stream, to create the “black” stream (the name is arbitrary). And let's go: “Create a flow” → “Flow type” → “Normal” → Position “2” → “Scheme” → “Add offers” → select our partner landing page in the search bar → check the box and “Add”.
P.S. If you want to put several landings in a split, then just add another landing right there and, where we can choose a percentage, we conditionally divide 50 by 50% or whatever you want.
After that, we go to the filters, drive in “Country”, select our GEO, on which we will pour and put the switch on “Yes”. That is, if we are pouring into Peru, then we need our partner landing page to be shown in Peru.
Everything, we save and the cloaca is configured.
Finishing touches
Further, if you look at the screenshot above, then we have a default domain. In other words, you don't have anything selected :), and without the domain, Keitaro won't give us our closed link. So first we need to go to the “Domains” tab at the very top, add the domain purchased in advance to the tracker (you can see how to do this here).
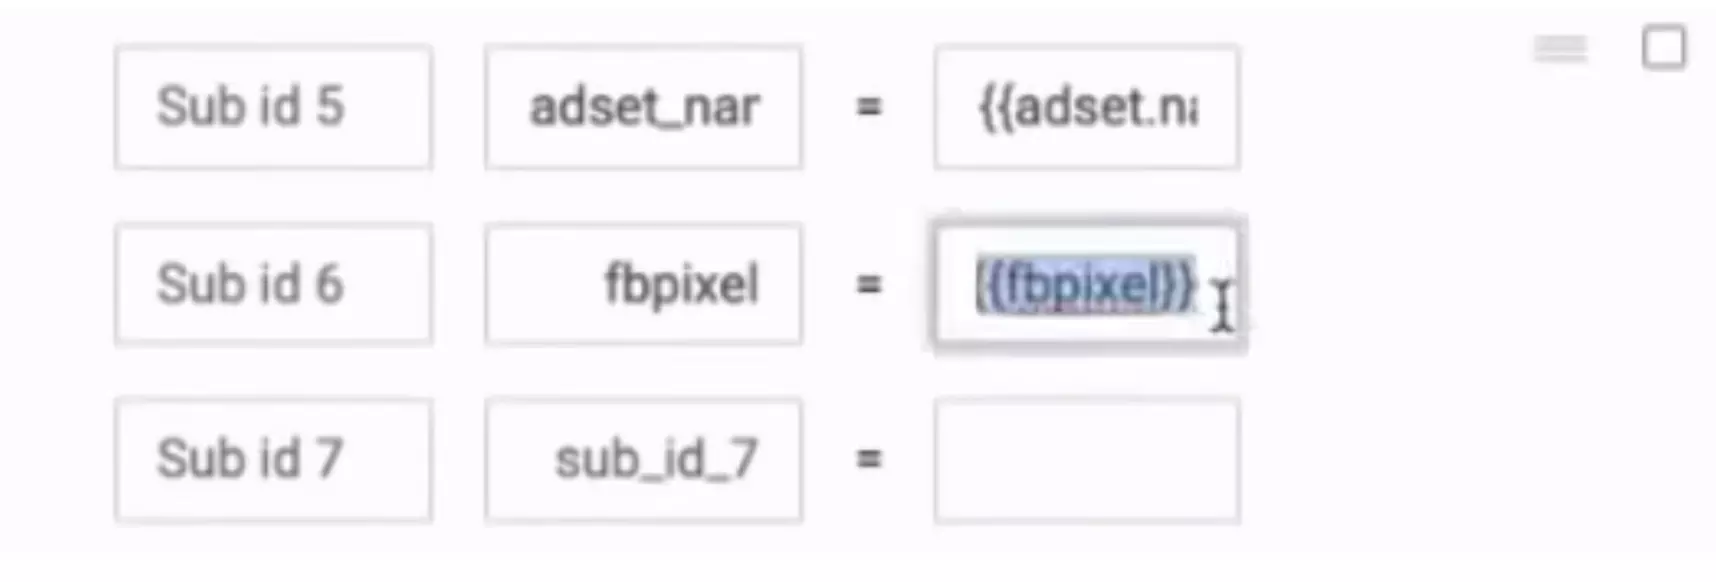
After that, we chose a domain, went to the "Integration" tab and took your link. If you are just testing this offer and it suddenly “popped”, let’s say you cast 2 conversion amounts and saw a prospect, then I advise you to add the FB pixel in the “Parameters” tab.
Everything, preserved, took the link and you can go to the bay.
Closing remarks from the editors of AffJournal
Affiliate marketing often forces you to promote offers using controversial and dubious approaches. Sooner or later, you will inevitably have to tailor the content to the right user. Hide pages from unwanted eyes and remove some landing blocks from some users. EVERY webmaster needs the basics of cloaking.
At first glance, it is not easy to learn and requires a deep study of traffic distribution systems for effective use. However, simple knowledge in network security and elementary programming is enough to realize all the possibilities of this technology.
by Editor
comments ....(0)
Leave a comment
You must be in to leave a comment